This article is brought to you by Lizzsews.
Here's how you can sew a beautiful patchwork heart coaster for Valentine's Day.
I wanted to sew something quick and easy for Valentine's Day, I thought about sewing a Valentine's Day quilt, but I just don't have the time for that right now. This is when I came up with the idea of a coaster, but this will be a Valentine's Day variation of the coaster!

What you will need:
100% cotton fabric, quilting cotton works best, red and black
Rotary cutter and self-healing cutting mat (or scissors)
Batting
Pins
Iron + ironing board
Sewing machine
Needle
Thread
Optional: quilting foot
The steps:
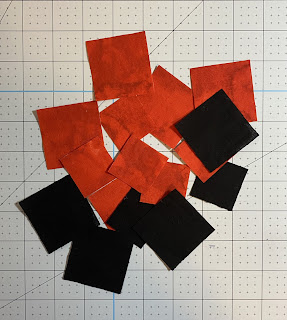
1. Cut 4 2" and 2 1 1/2" squares of black fabric, and 4 2" and 6 1 1/2" squares of red fabric.
2. Cut the 4 of the black squares (2") and 4 of the red squares (2") diagonally.


2. Sew each black triangle with a red triangle and press the seams open with an iron. Use a 5/16" seam allowance, in between 1/4" and 3/8". Cut the excess fabric of the seam showing outside of the square.


4. Arrange your squares to the shape of a heart like the image below, or by following the description below.

In the top left corner, place a square of two triangles, with the black triangle in the top left corner. In the square next to it, place another two-triangle square, with the red facing towards the bottom left corner. The two red triangles should be touching each other, and the black triangles should not be touching each other. Repeat this for the next two squares in the row. Each row will consist of 4 squares
In the next row, place 4 solid red squares in a row, underneath the previous row. In the next row, place a square of two triangles, black towards the bottom left corner, two solid red squares, and place another square of two triangles, black towards the bottom right corner.
In the last row, place one solid black square, two squares of triangles, red fabrics facing each other, and end the row off with one solid black square.
5. Sew each square together right sides together, row by row. Press the seams open with an iron. Use a 1/4" seam allowance.
6. Sew each row together right sides together and press the seams open with an iron. Use a 1/4" seam allowance.

7. Cut a square of black fabric 4 1/4" x 4 1/4" and batting the same size.
8. Place the two squares right sides together with the batting on top and sew around the square. Leave a little gap about 1" or more wide so you can flip it inside out afterwards.

9. Flip the coaster inside out.
10. Iron the coaster and poke out the corners, iron the raw edges of the gap inwards.
11. Top stitch around the coaster, ensuring that you close the gap.
Recommended read: What is topstitching
Optional: add a branding label to your coaster by placing it in the gap before sewing it closed.
Recommended read: How to make branding labels

Optional: free motion quilt the coaster.
Recommended read: How to sew quick and easy coasters
Recommended read: How to sew a quilted fabric tray
Recommended read: How to sew scrunchies
Leave a comment below and let me know if you made this coaster for Valentine's Day! And don't forget to subscribe to stay up to date with all of Lizzsews new articles. See you next time!
Comments
Post a Comment